
You're on a pre-shift walkround and the loader hose looks fine at a glance. It's sleeved, clamped and not leaking. Then you slide the sleeve back and find the cover polished thin where it's been rubbing the frame for weeks. That's the trap with hydraulic hose protection. Fitted well, it slows damage between inspections. Fitted blindly, it hides the wear you needed to see.
Hose Protection Types and What Each Stops
Protection stops a specific hazard, not failure in general. A sleeve won't stop a burst, a guard won't seal a weeping fitting, and a restraint won't prevent fluid escaping. Match the device to the damage mechanism first, then check what risk remains.
| Protection | Stops | Does not stop | Typical use |
|---|---|---|---|
| Abrasion sleeve | Wear from rubbing on frames and edges | Crushing, heat, high-pressure burst | Booms, chassis and frame contact points |
| Spiral wrap | Light wear and debris, quick to fit | Impact and fluid spray | Lines in mud, crop residue or dusty areas |
| Anti-burst sleeve | Spray from a split cover | Fitting separation and hose rupture | High-pressure lines within reach of operators |
| Fire-resistant sleeve | Heat and ignition risk near hot surfaces | Abrasion beyond its rating | Exhausts, engines and hot manifolds |
| Fixed guard or shield | Impact, crushing and pinch points | Hose movement inside the guard | Lines near moving linkages and pivots |
| Whip-check restraint | Uncontrolled hose travel after a fitting fails | Leaks at the fitting and fluid release | Test rigs and high-pressure runs as a secondary measure |
| P-clamp and routing clip | Hose movement and bend control | Abrasion at a loose clamp | Every run, at fixed intervals |
Where Each Type Earns Its Place
An abrasion sleeve is sacrificial. It takes the rub so the hose cover doesn't, but once it wears through, the hose is exposed again. Spiral wrap suits light contact and bundling because you can fit it quickly and leave gaps for inspection. Neither gives meaningful crush resistance.
An anti-burst sleeve has a different job. It diffuses spray from a split cover so a pinhole jet is less likely to hit an operator directly. It doesn't hold pressure and it doesn't stop a fitting blowing off. A fire-resistant sleeve buys protection near exhausts and manifolds, but it can still chafe through if it's dragging on steel.
Guards, Restraints and Clamps
A fixed guard is the right answer at pivots and linkages where impact or pinching would flatten a textile sleeve. Leave clearance inside it, or the hose will rub the guard instead of the frame. A whip-check restraint only limits travel after separation. Treat it as secondary protection, never as the guard itself.
P-clamps do the unglamorous work. They hold the route, control the bend and stop a hose migrating into trouble. A loose clamp becomes an abrasion point in its own right, so check tightness and cushion condition.
Practical rule: If you can't name the hazard a cover stops and the hazard it leaves open, don't fit it yet.
Protection reduces the chance of damage reaching the hose. It doesn't replace inspection, correct routing or depressurising before work.
Choosing Protection by Application
Start with a documented hazard assessment, not a product catalogue. Record the hose routing, connectors, likely rupture or ejection points, personnel exposure, bending, abrasion, heat and pressure-test conditions. Carry those findings into the choice, so each run gets protection for a stated reason.
Use this sequence. First, identify where the hose sits close to people. Second, list its movement, such as boom travel, articulation or mast lift. Third, note heat and abrasion sources. Fourth, rate the consequence if it fails. Fifth, choose the lightest protection that handles the top two hazards. When you're sizing a replacement run, a correctly specified 3/8 inch hydraulic hose still needs that same routing assessment before you add any cover.
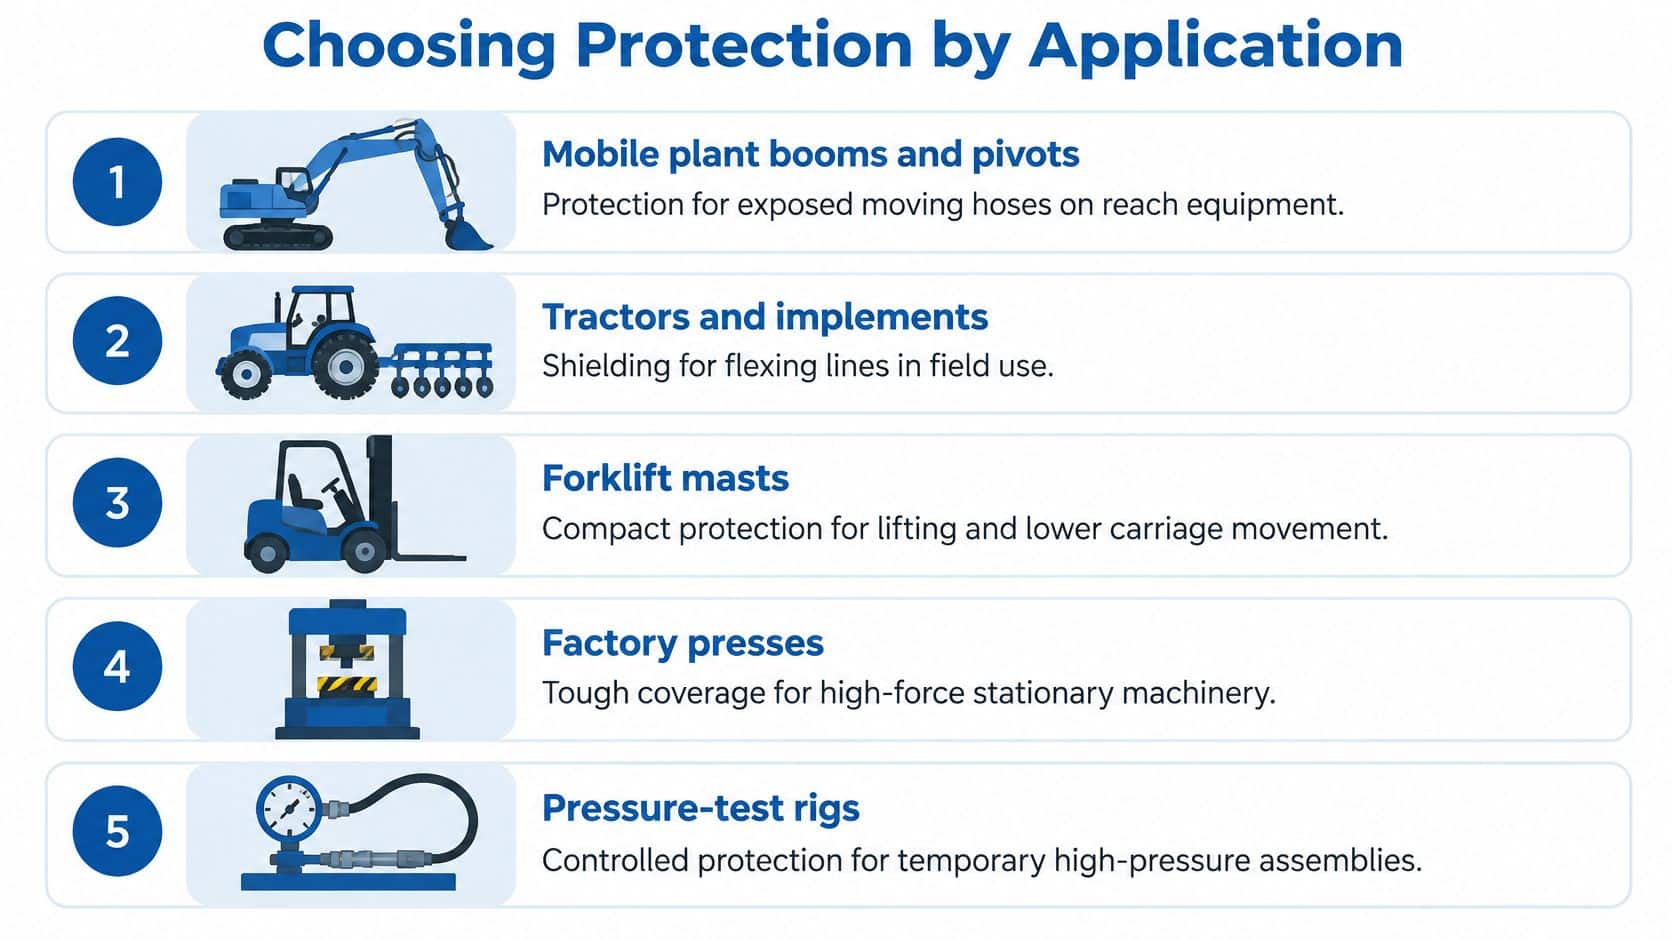
| Application | Main hazard | Protection to prioritise | Routing check |
|---|---|---|---|
| Excavator or mobile plant boom | Abrasion and crushing at pivots | Abrasion sleeve with a fixed guard at the pivot | Keep bend radius and avoid rubbing on the boom |
| Tractor and implement | Mud, crop residue, impact and articulation | Spiral wrap or sleeve with clamps; anti-burst where operators reach | Allow articulation without tension on the fitting |
| Forklift mast | Repeated flexing and pinch points | Clamped routing and guards at mast rollers | Check for rubbing at each shift |
| Factory press or manufacturing line | Heat, oil mist and operator access | Fire-resistant sleeve, fixed guard and anti-burst on high-pressure runs | Keep clear of walkways and access points |
| Pressure-test rig | Whiplash when a hose fails | Enclosure shield plus whip-check restraint | Confirm restraint is fitted before pressurising |
A Working Example
Say a tractor loader line rubs the frame in a mud-covered yard. Fitting a thicker sleeve alone just gives you a thicker thing to wear through. Move the clamp a short distance, shift the rub point off the frame edge, then sleeve the remaining contact zone. The routing change does most of the work, and crop residue and wet soil are easier to wash off before inspection.
That matters beyond downtime. A burst line in a field can put oil onto soil, so preventing the rub protects the ground as well as the machine.
Heavier isn't automatically safer. A tight, heavy cover can restrict bend movement, trap grit against the cover and hide abrasion until reinforcement shows.
I would always inspect the hose under its cover at each service. If the cover can't be lifted or slid back, you've traded visibility for a false sense of security.
How to Route and Fit Protection Step by Step
Fit protection as part of the complete assembly, not as an afterthought. For selection, routing, fabrication, installation, replacement, maintenance and storage, BSI guidance on PD ISO/TS 17165-2:2018 recommends that standard for assemblies using hoses to ISO 1436, ISO 3862, ISO 3949, ISO 4079 and ISO 11237, with fittings in the ISO 12151 series. It records improper use as a cause of actual failures, which is why sleeves and guards must not compromise bend radius, fitting installation or maintenance access.
-
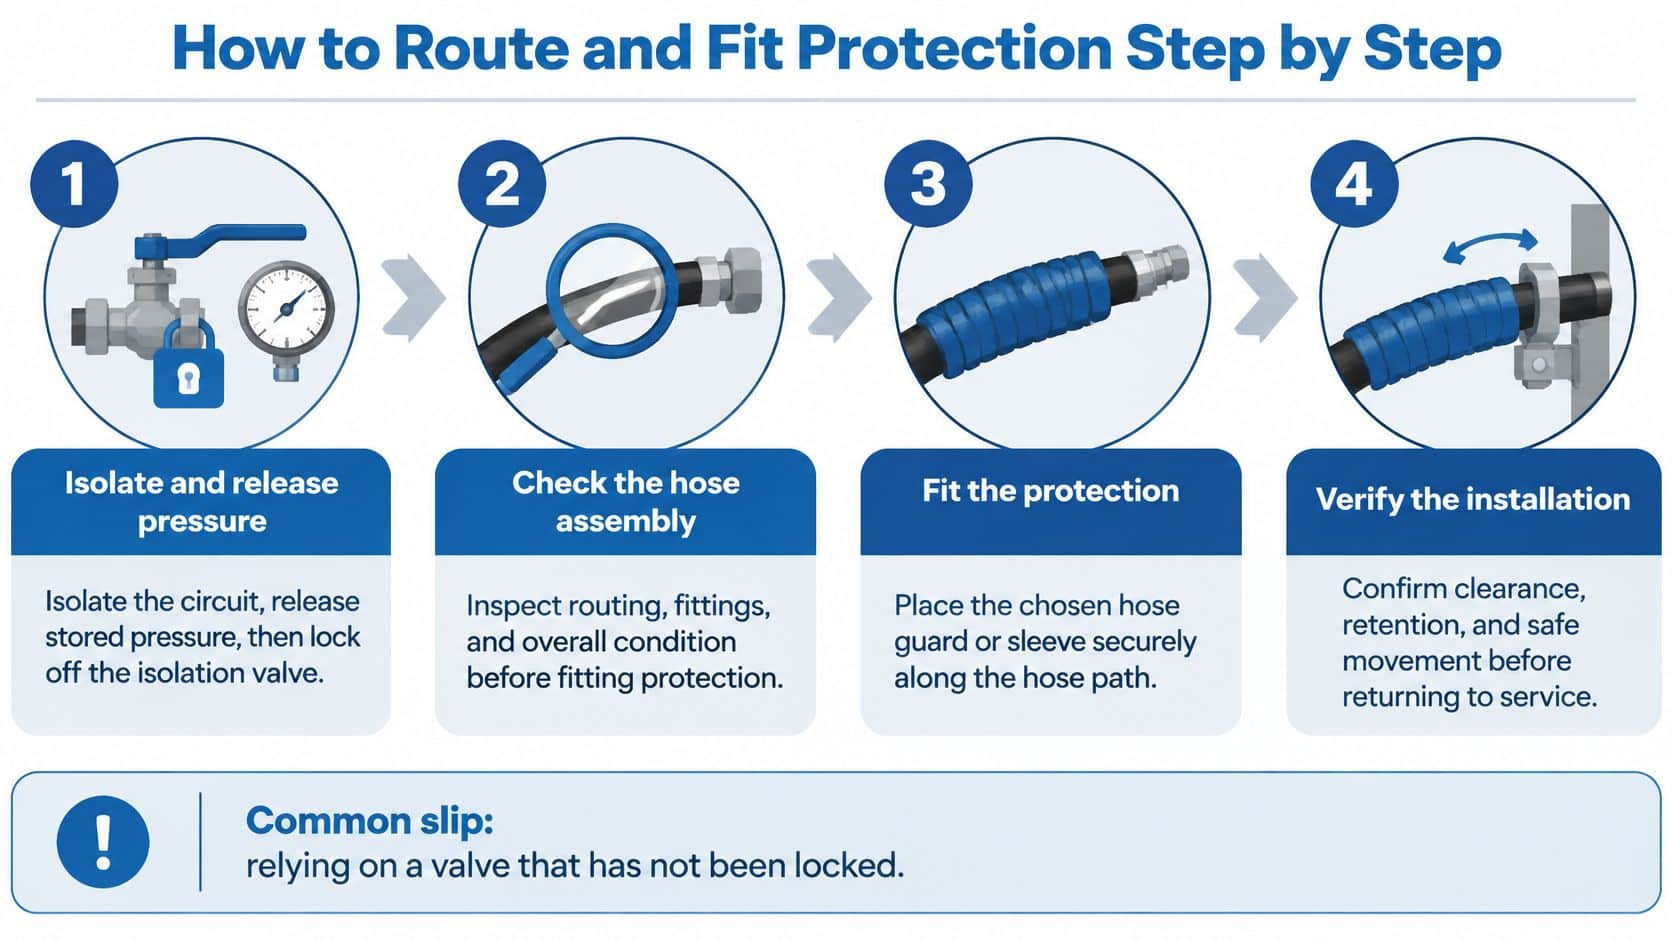
Isolate and release stored pressure. Shut off the circuit, operate controls to relieve trapped pressure where the machine procedure allows, then lock off the isolation valve. The common slip is relying on a valve that hasn't been locked.
-
Check the assembly rating. Confirm the hose, fittings and protection suit the working pressure, fluid and temperature, and match the standard the supplier cites. Don't let a sleeve rating distract you from the hose assembly rating underneath.
-
Measure the route under movement. Set length so the assembly doesn't pull at the fitting at full articulation, lift or steer. A hose that's too short under movement will fret at the ferrule and eventually leak there.
-
Prove the bend radius at every bend. Keep each bend above the hose maker's minimum, measured to the inside of the bend. Tight bends at clamp points are the usual slip, because the clamp looks tidy while it's forcing the hose to kink.
-
Route away from trouble. Keep clear of moving linkages, sharp edges, hot surfaces and walkways. Where you can't avoid a hot or moving zone, that's where a guard or fire-resistant sleeve earns its place.
-
Fit the sleeve or wrap before the clamps. Position it exactly where the rub would occur, with enough overlap either side. Then fit a suitable clamp for tubing and hose runs so the cover stays put without being crushed.
-
Fit guards and shields before pressurising. Check clearance through the full range of movement. A guard that touches at full lock or full lift is a new wear point.
-
Fit whip-check restraints on high-pressure test lines. Anchor them properly and keep personnel out of the line of travel. They limit movement after a failure, they don't prevent the failure.
-
Pressurise gradually. Check for leaks only after the proof or standard pressure test has been completed safely. Don't put hands near a joint during first pressurisation to feel for a weep.
What Good Looks Like
A correctly fitted run has no twist, no tension at the fitting and no bend tighter than the minimum radius. The sleeve covers the rub point, clamps hold without biting, and there's clear space around every guard through full movement. You can also lift the protection later to inspect what's underneath.
If you have to force the hose into the clamps, stop. The length or route is wrong, and protection fitted over a bad route only hides the problem.
Inspection, Damage Signs and Response
A sleeve can conceal a leak while oil travels along its inside, leaving the visible stain far from the fault. Treat protection as part of the inspection system: it helps control damage, but it must not obstruct checks or hide deterioration.
Set check frequency by duty cycle, environment and the consequence of failure. The HSE guidance on hydraulic fluid safety in agriculture advises considering these risks; the intervals below are suggested practice, not a fixed rule. A competent person should make a close visual check at each planned inspection.

| Situation | Suggested interval | What to check |
|---|---|---|
| High-risk system with high pressure or nearby operators | Pre-shift or weekly | Leaks, cover damage and kinks |
| General mobile or industrial plant | Monthly to quarterly, based on risk | Abrasion, crushing and fittings |
| After installation | After the first pressurisation | Routing, bend radius and leaks |
| After relocation or reassembly | Before the machine returns to use | Hose length, twist and restraints |
| After impact or suspected damage | Immediately | Hose, fitting and protection, with the result recorded |
What to Check Every Time
Check for abrasion, cuts, crushing, kinks, bulges, leakage, exposed reinforcement, heat damage and compromised fittings. Inspect beneath protective covers where wear may be concealed, especially around clamps, frame edges and pivots. Look for guards bent against the hose and sleeves that have shifted away from the wear point.
For example, if a loader-arm hose shows cover wear at a clamp during a monthly check, increase checks to weekly while correcting the cause. Reassess the interval once the route is corrected. The guide to common hydraulic hose failure causes explains how routing and pressure problems can contribute to damage.
Damage Actions
- Visible reinforcement: Replace the hose assembly. A wrap cannot restore its strength.
- Cut deeper than the cover: Replace the assembly.
- Bulge or soft spot: Remove it from service. The reinforcement or inner tube may be compromised.
- Kink or twisted run: Isolate the system, correct the route, and check hose length and bend radius before reuse.
- Weep at a fitting: Isolate and depressurise before tightening or replacing parts to the maker's data. Never tighten a fitting under pressure.
- Rubbing on a metal edge: Correct the route first, then add suitable protection and recheck after a short period in service.
A visible vehicle-fluid leak should be corrected, not monitored indefinitely. See steering violation guidance from My Safety Manager.
Watch a practical inspection routine before building a checklist.
Injection Injury and Spills
Pressurised hydraulic fluid can penetrate skin through a pinhole. Never use bare hands to find a leak. Hold card or paper at a distance, keep the area guarded, and clear other people from the hazard zone. Seek urgent medical treatment for any suspected injection injury, even if the entry mark looks small.
A sleeve worn through has failed and must be replaced; inspect the hose beneath it. An intact sleeve can still conceal wear, trapped grit or a weep. Fluid may travel along the cover and appear well away from the defect.
Clean up oil promptly under applicable local rules, since fluid can reach soil and drains. Record the machine, hose position, defect, action taken and next check date.
A sleeve that hides wear is worse than no sleeve, because nobody looks underneath it.
UK Standards and Duties Behind the Plan
In the UK, hydraulic hose protection sits inside your PUWER inspection system. The HSE guidance on PUWER Regulation 6 inspection states that equipment exposed to conditions capable of causing deterioration must be inspected at suitable intervals, set by risk assessment and informed by manufacturer recommendations, industry advice and operating experience. That's the legal reason your intervals in the table above flex with duty and consequence rather than hose age alone.
Inspection is also required after installation where safety depends on installation conditions, after reassembly at a new location and after exceptional circumstances such as suspected serious damage. Results must be recorded and retained at least until the next inspection, and equipment shouldn't be used if a required inspection hasn't taken place. Those duties map directly to the after-installation, relocation and impact rows.
The HSE PUWER overview requires equipment to be suitable, maintained in a safe condition and kept in an efficient state, efficient working order and good repair by competent people. It identifies protective devices, warnings and isolation from energy sources, including hydraulic energy, as appropriate measures. That supports step one of the fitting sequence, isolate and lock off, and the use of guards where people work nearby.
For pressure testing, HSE guidance GS4 on safety in pressure testing states that flexible hose assemblies must be restrained or shielded to limit whiplash, while treating whip-check cables as additional protection and not a substitute for a protective enclosure. It also supports checking for leaks only after a successful proof or standard test, using proof-test multipliers of 1.25 or 1.5 times maximum rated pressure depending on the applicable basis.
Put together, the duties are simple. Protect against deterioration, inspect at risk-based intervals, inspect again after change or damage, keep records, and use competent people.
Confirm Your Protection Plan This Week
Every high-pressure run should have three things by the end of the week. A protection type matched to its hazard, a named inspection interval and a recorded check with a date and result. If one of those is missing, the run isn't controlled yet, however tidy it looks.
Work through this checklist machine by machine:
- Matched protection: Each run has a sleeve, guard, restraint or clamp chosen for a named hazard.
- Bend radius: Each bend is above the maker's minimum, with no twist or tension at fittings.
- Guard clearance: Each guard leaves clear space through full movement.
- Inspection record: Each check has a date, a result and a next due date on file.
- Under-cover check: Each sleeve can be lifted so the hose beneath gets inspected.
We support customers nationwide with product sourcing, system components, custom power-pack assembly and technical advice, with phone and email support from our Scunthorpe base. Phone 01724 279508 today for application advice and component selection, or send us a message through our contact us page.
For sleeves, clamps, hose assemblies and the components around them, talk to MA Hydraulics Ltd about matching protection to the machine, the pressure and the inspection interval you can maintain. Phone 01724 279508 today and we'll help you turn a list of at-risk runs into a documented, workable protection plan.
