
You're usually called to an accumulator when something else already feels wrong. The press has started to snatch. The power pack is hunting. A mobile machine brake circuit feels lazy on first movement in the morning. Someone says the pump sounds harsher than it did last week. By that point, the accumulator isn't just a vessel sitting in the circuit. It's become the difference between a stable system and one that's drifting into faults.
An accumulator charging procedure looks routine on paper. In practice, it's one of those jobs that punishes shortcuts. Get it right and the circuit cushions, stores energy and responds as intended. Get it wrong and you can damage the bladder, misread the pre-charge, chase false faults elsewhere in the system, or create a serious safety risk in the workshop.
Why This Procedure Demands Your Full Attention
A gas-charged accumulator does two jobs at once. It improves hydraulic performance, and it stores energy in a pressure vessel. That second part is what technicians can never treat casually. Even on a familiar machine, the charging point isn't just another service port. It's the interface to stored gas energy that has to be handled with the same discipline every time.
The most common trap is assuming a poor-performing accumulator only needs “a bit of gas put in it”. That mindset leads to rushed charging, no proper isolation, no stabilisation wait, and a gauge reading that looks right for a few moments but isn't the true final pressure. Then the machine goes back into service and the fault returns, often with a damaged bladder added to the list.
What the real job actually is
A proper accumulator charging procedure isn't only about adding nitrogen. It's about confirming the unit is safe to work on, setting the pre-charge to suit the circuit, and proving the final result is trustworthy. That means treating the charge as a controlled engineering task rather than a quick service adjustment.
In the field, poorly charged accumulators tend to show up in predictable ways:
- Erratic pressure support where the system should feel smooth and consistent
- Poor emergency or reserve function when the accumulator is meant to hold stored energy
- Harsh cycling that gets blamed on pumps, valves or controls first
- Repeat call-outs because the original charge was based on a false pressure reading
A correctly charged accumulator improves system behaviour. An incorrectly charged one can hide a fault long enough to waste hours of diagnostics.
That's why the safest approach is also the most efficient one. Isolate fully. Charge slowly. Let the gas settle. Verify what you've done. If a circuit is safety-critical, especially on mobile or agricultural equipment, that discipline matters even more.
Essential Pre-Checks and System Preparation
Before the nitrogen bottle comes anywhere near the machine, the job starts with control of the work area and the system state. Most avoidable mistakes often originate at this stage. If the accumulator hasn't been isolated and the circuit hasn't been properly depressurised, nothing that follows is safe.
Start with the basics that prevent bad decisions
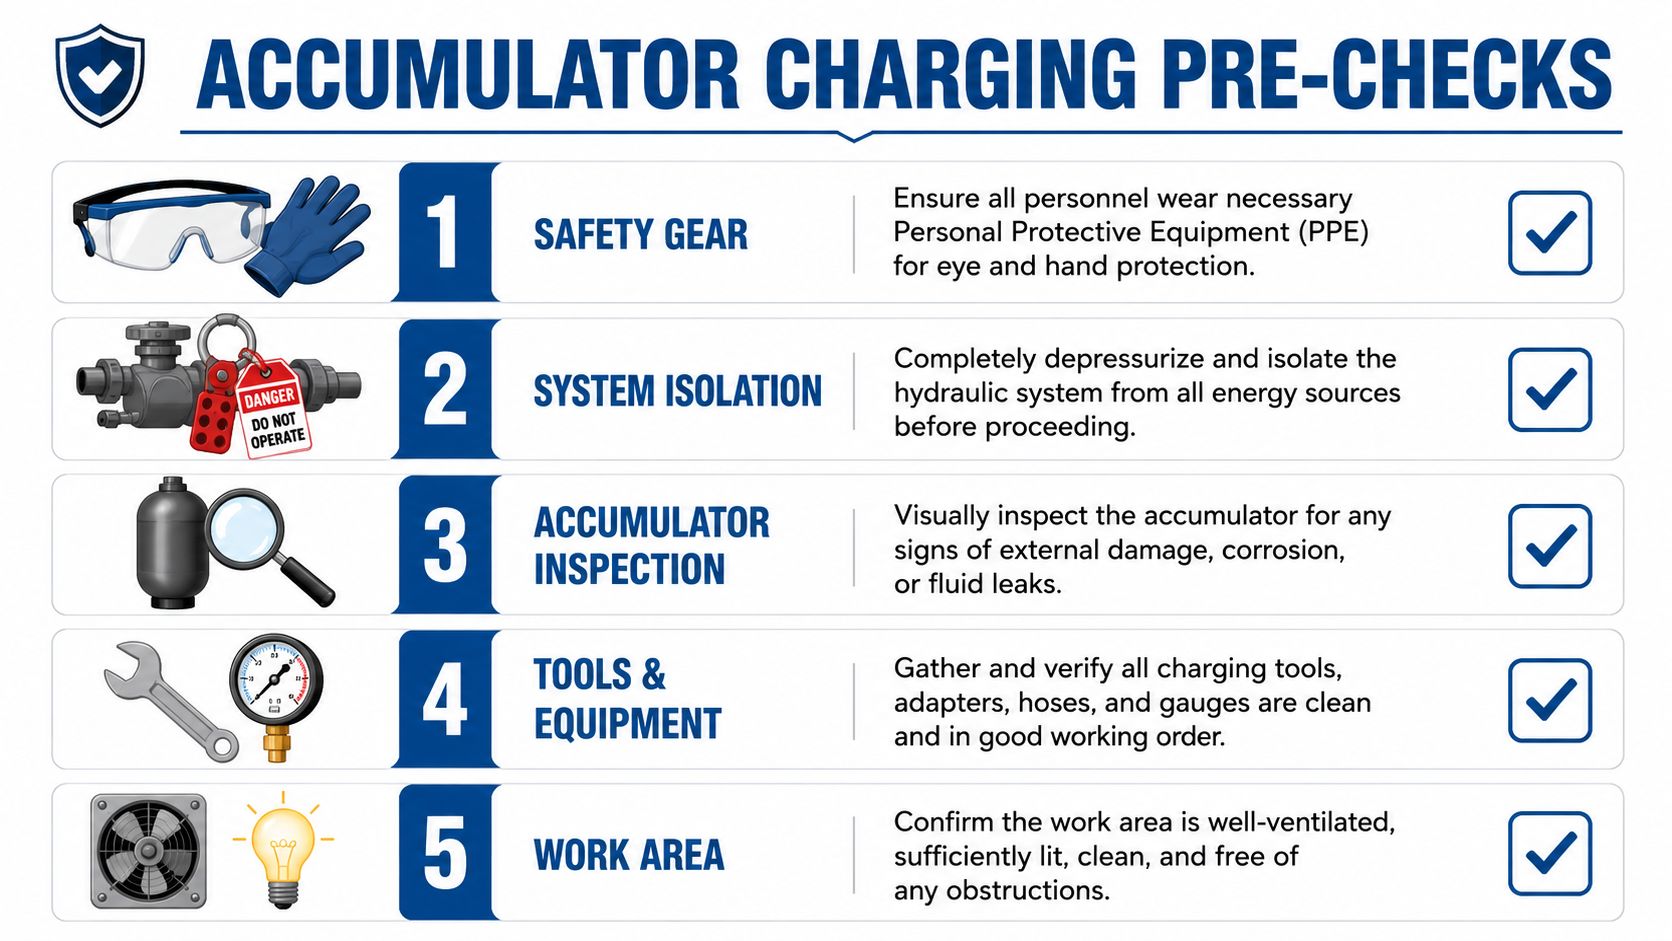
Wear eye protection and gloves. Use a calibrated charging and gauging kit with the correct adaptor for the valve fitted to the accumulator. Check the hose condition, gauge face, bleed arrangement and bottle regulator before you connect anything. A dirty adaptor or damaged seal can turn a straightforward charge into a leak chase.
The work area matters more than people admit. Good lighting, enough space around the accumulator, and a clear route for safe access to isolation points all reduce the chance of rushed handling. If you're working on plant equipment outdoors, poor footing and cold hands make small errors more likely.
Isolation and depressurisation are non-negotiable
Hydraulic isolation has to be positive, not assumed. Shut down the prime mover, isolate electrical controls, lock off where required, and make sure all sources of stored hydraulic energy are discharged in the correct sequence for that machine. On some systems, trapped pressure remains even after the pump is stopped.
Depressurisation warning: Never loosen fittings, remove valve caps or connect a charging head on the assumption that the circuit is at zero pressure. Prove it first, then proceed.
A practical pre-flight checklist looks like this:
- PPE on first: Eye and hand protection should be in place before touching service caps or fittings.
- Machine isolated: Electrical and hydraulic energy sources must be shut off and secured.
- Pressure proven dead: Confirm system pressure is released using the machine's approved depressurisation method.
- Accumulator inspected externally: Look for shell damage, corrosion, fluid leakage and damaged charging hardware.
- Tools verified: Charging kit, gauge, regulator, adaptors and valves should be clean and serviceable.
Don't skip shell preparation
One point that gets missed far too often is lubrication of the accumulator shell interior before charging where the manufacturer procedure calls for it. In the UK mobile and industrial sector, failure to lubricate the shell or allow temperature stabilisation is a documented common pitfall causing 30–40% of premature bladder rupture cases in accumulators under 55 L, according to field maintenance data cited in the STAUFF charging kit instructions.
That's not a minor workshop detail. It's one of the steps that separates a healthy bladder from one that's being dragged or pinched during service. If you're still at the stage of selecting the right vessel size and pre-charge basis, it helps to sort that upstream with proper hydraulic accumulator sizing guidance.
Check what you're charging and why
Before charging, know the target and the function. Is the accumulator there for shock suppression, emergency reserve, pulsation damping or brake support? The charging target has to match the duty. Charging without that context is how otherwise careful technicians end up with a number on the gauge but the wrong result in service.
The Correct Nitrogen Charging Process Step-by-Step
Once the machine is safe and the accumulator is ready, the charging job becomes a controlled pressure adjustment. The words that matter here are dry nitrogen, slowly, and stabilise.
Use the right gas and the right hardware
In UK hydraulic safety standards, nitrogen with a purity of at least 99.8% is mandatory for accumulator charging, and the common rule where no specific calculation is provided is to set pre-charge between 80% and 90% of the minimum system working pressure, as set out in the STAUFF universal charging kit guidance.
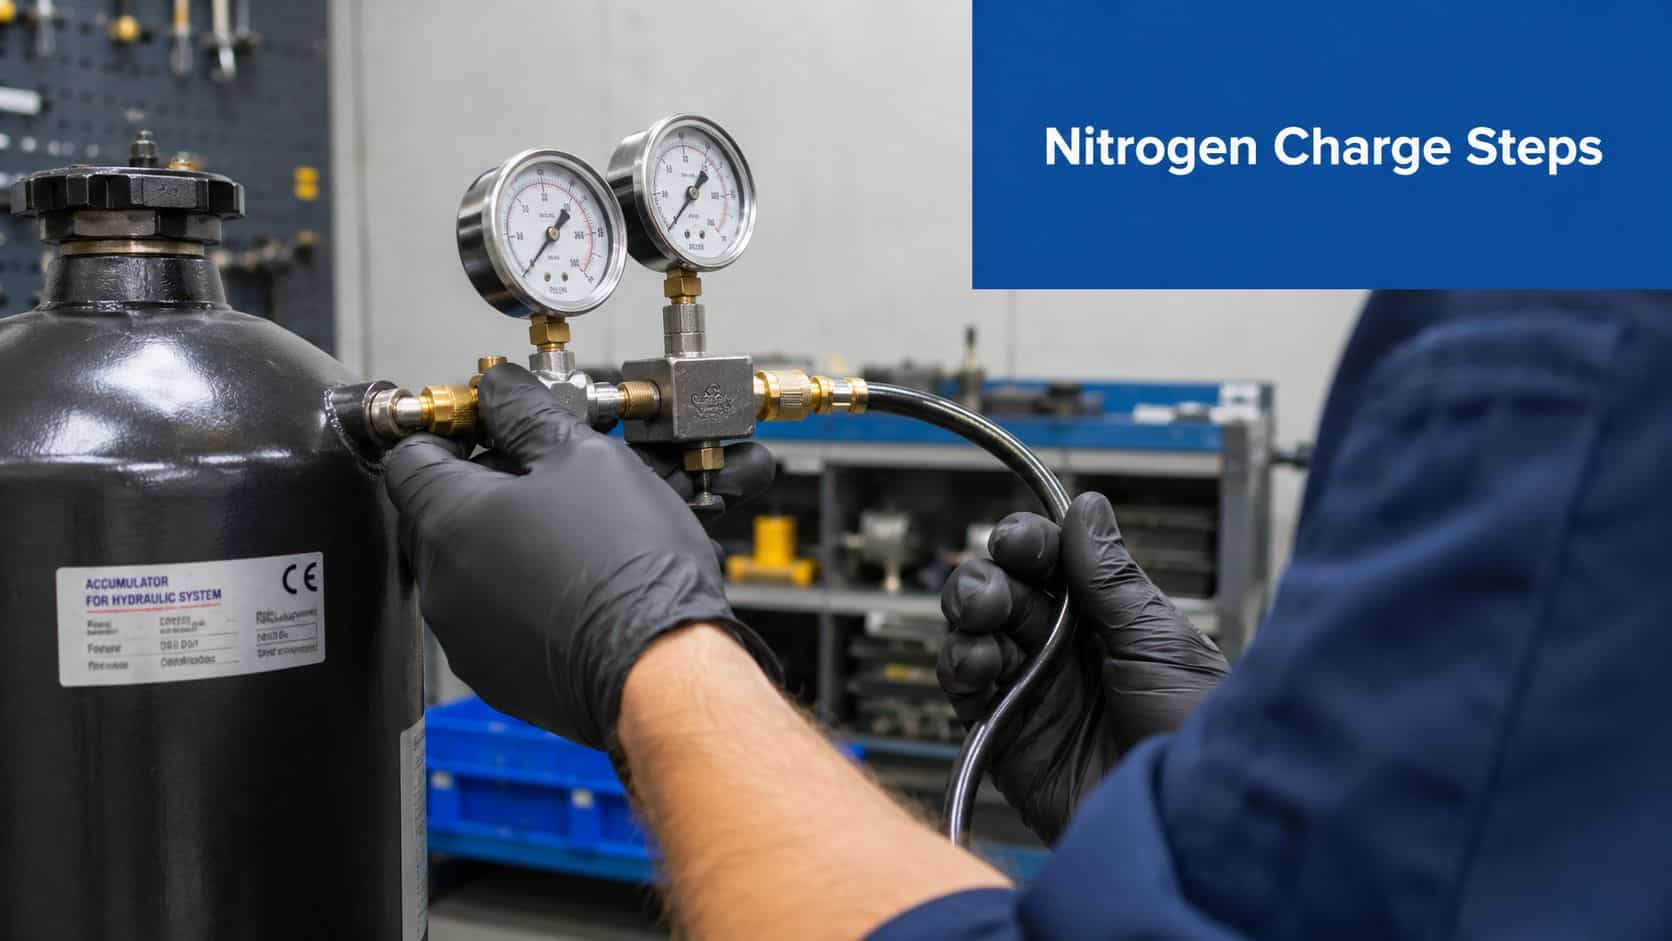
That means no oxygen, no compressed air, and no improvisation with the gas source. Use a bottle with a proper pressure-reducing valve. Connect the charging head securely to the accumulator valve. Make sure the bleed path is understood before introducing gas. If the bottle pressure exceeds what the accumulator should ever see, the regulator isn't optional.
The charging sequence that works in real workshops
A reliable accumulator charging procedure follows a deliberate order:
- Connect the charging kit to the accumulator valve with the correct adaptor and confirm the kit valves are in the correct starting position.
- Fit the nitrogen bottle regulator and set the outlet so you can approach target pressure in a controlled way.
- Open the gas supply slowly and begin introducing nitrogen at a measured rate.
- Watch the gauge continuously rather than trying to rush to the target in one movement.
- Pause as you approach the intended pre-charge so the reading can settle before any fine adjustment.
If the manufacturer gives a model-specific charging value, use it. If not, the 80% to 90% rule is the accepted starting point for many systems.
Why slow charging matters
Charging too quickly cools the gas as it expands. That cooling effect gives you a pressure reading that can look lower than the true settled pressure. Technicians then keep adding gas, thinking they're still under target. Once the temperature equalises, the pressure rises beyond where it should be.
Practical rule: If you're in a hurry while charging, the gauge is likely to lie to you.
That's why best practice is to charge slowly and then wait several minutes before rechecking the final pressure, as noted in the STAUFF guidance above. Other charging procedures used in practice also work by deliberately overshooting slightly, allowing temperature to settle, and then bleeding back to the exact figure. The point isn't the ritual. The point is to avoid trusting a hot or cold transient reading.
For technicians who like to see the kit handling sequence in motion, this short demonstration is useful background before carrying out the job on site.
Small habits that prevent expensive mistakes
A few workshop habits consistently produce better results:
- Keep the charging rate low: It protects the bladder and improves reading accuracy.
- Use clean fittings only: Dirt in the valve area turns into nuisance leaks later.
- Stop short and creep up on the target: Fine control beats one-shot charging every time.
- Record the settled pressure, not the first reading: Only the stabilised value matters.
Where technicians need a charging kit and matching hydraulic components for service work, MA Hydraulics Ltd supplies accumulator-related hydraulic hardware as part of its broader component and power pack offering. That doesn't remove the need for the correct procedure, but it does mean the charging setup can be matched properly to the application.
Verifying the Charge and Advanced Leak Testing
A charge isn't finished when the gauge first reaches the target. It's finished when the pressure has stabilised, the final reading is confirmed, and the accumulator has shown that it can hold that condition without hidden leakage.
First verify the settled pressure
After charging, leave the gas long enough to equalise with ambient temperature. Then re-read the pressure and adjust carefully if needed. If the pressure is high once settled, bleed off excess gas in a controlled way until the final figure is correct. If it's low, top up gradually and repeat the wait.
Patient technicians, by exercising patience, save themselves repeat work. Most “mystery” pre-charge discrepancies come from taking the first reading as the final answer.
Standard leak checks still matter
Before moving to more advanced validation, check the obvious leak points. Look at the charging valve, adaptor faces and hose connections. If your site procedure allows it, use a leak-detection method suitable for gas connections to confirm there's no external leakage at the charging hardware.
A practical note from the workshop. If the charge falls off quickly and the external connections are sound, don't keep recharging in the hope it will settle. That usually points to an internal problem or a valve issue that needs proper diagnosis.

Hysteresis testing finds what quick checks miss
Most basic charging guides stop too early. In UK industrial work, that's a weakness because some accumulator faults only show up during a short stability hold rather than at the moment of charging.
Recent 2025 data from the UK Hydraulic Trade Association shows 32% of accumulator failures in UK manufacturing plants stem from undetected micro-leaks that only manifest during hysteresis cycles, and only 12% of maintenance teams currently perform this validation step. The same guidance states pressure deviation must not exceed 0.5% over 5 minutes to confirm seal integrity, with reference to the Hystat operating instructions and cited UK trade data.
That makes hysteresis testing more than an academic extra. It's a practical way to catch faults that a quick gauge glance won't reveal.
A workable hysteresis check
Use a simple hold-and-observe method after final adjustment:
| Check point | What to do | What you’re looking for |
|---|---|---|
| Stabilised start | Confirm the accumulator is at its final settled pre-charge | A trustworthy baseline |
| Timed hold | Observe pressure over 5 minutes | Drift greater than the allowed limit points to leakage |
| Repeatability | Recheck if needed after reconnecting or confirming fittings | Whether the pressure behaviour is consistent |
If a unit fails this check, the right move is investigation, not repeated topping up. For broader pressure testing procedures for hydraulic systems, the same logic applies. A test only has value if it proves integrity, not if it just produces a number.
Pressure that looks correct for ten seconds can still be wrong for service. Hold time reveals the truth.
Common Faults and Critical Troubleshooting
A common callout in a British yard goes like this. The accumulator was charged yesterday, the machine is back on shift this morning, and now the operator is reporting harsh response, noisy cycling, or poor emergency function. At that point, guessing is what gets people hurt.
Fault-finding starts by separating three possibilities. The charge was set incorrectly. The test setup gave a false reading. The accumulator has a real defect and should come out of service.
Accumulator Charging Troubleshooting Guide
| Symptom | Probable Cause | Solution and Safety Warning |
|---|---|---|
| Pressure rises too quickly during charging | Regulator set incorrectly, pressure reducer omitted, or cylinder valve opened too aggressively | Stop charging at once. Isolate the bottle, back out the setup, and confirm the regulator is fitted and adjusted correctly before restarting. Fast gas entry can damage the valve assembly and gives a false sense that the unit has accepted charge properly. |
| Final settled pressure is higher than expected | Gas introduced too quickly, then checked before the temperature stabilised | Let the accumulator settle fully, then bleed back in a controlled manner and recharge slowly if needed. In cold UK workshop conditions, this error shows up often because the first reading can shift as gas temperature equalises. |
| Pressure drops soon after charging | Leak at the gas valve, poor connection at the charging head, damaged valve core, or internal bladder or seal fault | Check the easy leak points first with the correct test method. If the external connections are sound and pressure still falls, remove the accumulator from service for inspection. Repeated top-ups only hide the fault. |
| Gauge reading looks erratic or inconsistent | Gauge fault, loose adaptor, contamination in the charging unit, or sticking gauge movement | Swap in a known calibrated gauge and inspect the charging head, seals, and threads. If the reading changes when you disturb the tool, do not trust the result. |
| Accumulator will not accept charge normally | Wrong adaptor, valve pin not engaging correctly, blocked charging path, or internal mechanical failure | Confirm the charging kit matches the accumulator make and valve type. If the setup is correct and gas still will not enter in a controlled way, treat the unit as suspect and investigate off-line. |
| Technician suggests oxygen or compressed air | Unsafe gas selection | Stop the job. Use dry nitrogen only. Oxygen and compressed air create an ignition and explosion hazard in hydraulic service and are prohibited for accumulator charging under normal practice. |
What good troubleshooting looks like on site
Work in order. Confirm the nitrogen bottle label. Confirm the regulator setting. Confirm the gauge calibration status. Confirm the adaptor is correct for the valve fitted. Then decide whether the problem sits in the charging equipment or inside the accumulator.
That sequence matters because accumulator faults often get blamed for service-tool errors. I have seen units condemned when the actual issue was a worn charging head seal or a gauge that never returned to zero.
Cold weather adds another trap in UK agricultural and mobile plant work. A machine charged in a heated workshop can show a lower apparent pre-charge outside, especially first thing in the morning. That does not mean it automatically needs more nitrogen. It means the reading has to be judged against actual equipment temperature and service conditions.
Checks that go beyond a quick pressure reading
A single pressure number is not enough when symptoms persist. If the machine shows unstable behaviour after charging, repeat the verification under controlled conditions and compare the reading after a short stabilisation period. If pressure drift is present, investigate the leak path before adding gas.
Where the duty is safety-related or the history is unclear, add a recorded inspection step to your site files. Good hydraulic maintenance documentation management makes repeat faults easier to trace and stops the next technician inheriting guesswork.
Hysteresis behaviour is also worth checking if the accumulator appears to charge correctly but performs poorly in service. If pressure response is inconsistent across repeated cycles, the problem may be internal friction, bladder damage, or gas loss that a static reading does not fully reveal.
Faults that usually make the job worse
- Topping up repeatedly without finding the cause. This masks leakage and delays proper repair.
- Charging too fast to save a few minutes. The pressure reading becomes unreliable and components take unnecessary stress.
- Assuming the rest of the hydraulic system is at fault first. A badly charged accumulator can mimic pump, valve, and control problems.
- Leaving the service result unmarked. The next technician has no baseline and may repeat the same error.
Calm, methodical troubleshooting is what keeps accumulator work safe. If the readings do not make sense, stop and prove each part of the setup before the unit goes back into service.
UK Regulatory and Documentation Best Practices
Good charging practice doesn't stop at the pressure gauge. In the UK, compliance lives in the details after the service task as much as in the charging itself. If the accumulator is part of a safety-related function, weak documentation and poor traceability can become just as serious as a poor pre-charge.
Traceability protects the next intervention
After charging, fit the valve protection cap correctly and mark the unit with the service date and pre-charge value in line with site practice. That's not box-ticking. It tells the next technician what was done, when it was done, and what target was used.
In mobile and agricultural equipment, vibration and dirt are unforgiving. A missing cap or unclear service mark invites accidental depressurisation, contamination, or unnecessary repeat work. Clear records reduce all three.
UK ambient conditions change the real result
This is the point many generic guides miss. The pre-charge you set in the workshop may not be the pre-charge the machine effectively has in service when the temperature drops.
UK data shows winter operating temperatures in agriculture can fall to -5°C, causing a 15% pressure drop in nitrogen pre-charge. The same source notes that HSE guidance requires hydraulic safety systems in UK mobile machinery to maintain 90% of specified pre-charge pressure at minimum ambient temperature to prevent catastrophic failure, as discussed in this Machinery Lubrication article on hydraulic accumulators.
That matters directly for brake support, emergency reserve and other safety-critical functions. If you charge solely for a mild workshop condition and ignore seasonal temperature, the machine may be compliant when parked and unsafe when working.
Cold-weather pre-charge isn't a theoretical calculation for UK plant. It affects whether the safety function is still there when the operator needs it.
Documentation is part of the engineering control
A sound record should include the stabilised pre-charge, ambient conditions where relevant, service date, and any observations about leak testing or abnormal behaviour. That gives maintenance teams a trend to work from instead of a chain of isolated guesses.
For companies trying to keep service history consistent across multiple machines and technicians, a structured approach to documentation management makes these accumulator checks easier to track and verify. In practice, that's what turns one correct charge into a repeatable maintenance standard.
Your Next Step for Hydraulic Safety and Support
A safe accumulator charge depends on disciplined method from start to finish. The technician who isolates correctly, uses dry nitrogen with the right charging gear, allows pressure to stabilise, and then confirms the final reading under real workshop conditions is the one who prevents failures later in service.
That standard matters even more on UK plant and agricultural machinery, where cold mornings, intermittent use, and outdoor storage can expose weak charging practice very quickly. A machine can appear fine in the bay and still lose dependable accumulator performance once it returns to work. Good service includes proving the result, recording it properly, and questioning anything that does not behave as expected on repeat checks or hysteresis testing.
For teams building maintenance routines around hydraulic reliability, this practical guide for field service maintenance is a useful companion read because it places charging work in the wider discipline of planned service rather than fault chasing.
If pre-charge keeps dropping, if the accumulator supports a safety function, or if the system has been modified from the original build, get the unit and circuit reviewed by an experienced hydraulic engineer before the fault spreads into valves, pumps, or machine control problems.
If you need help with accumulator charging procedure, component selection, or a bespoke hydraulic solution, contact MA Hydraulics Ltd. Phone 01724 279508 today, or send us a message.
