When a hydraulic pump starts to go, it rarely does so silently. That sudden change in your machine’s behaviour—a new noise, a sluggish cylinder—is often the first and only warning you’ll get. Acting on these early signs is what separates a routine repair from a catastrophic failure that brings your entire operation to a standstill.
How To Spot a Failing Hydraulic Pump
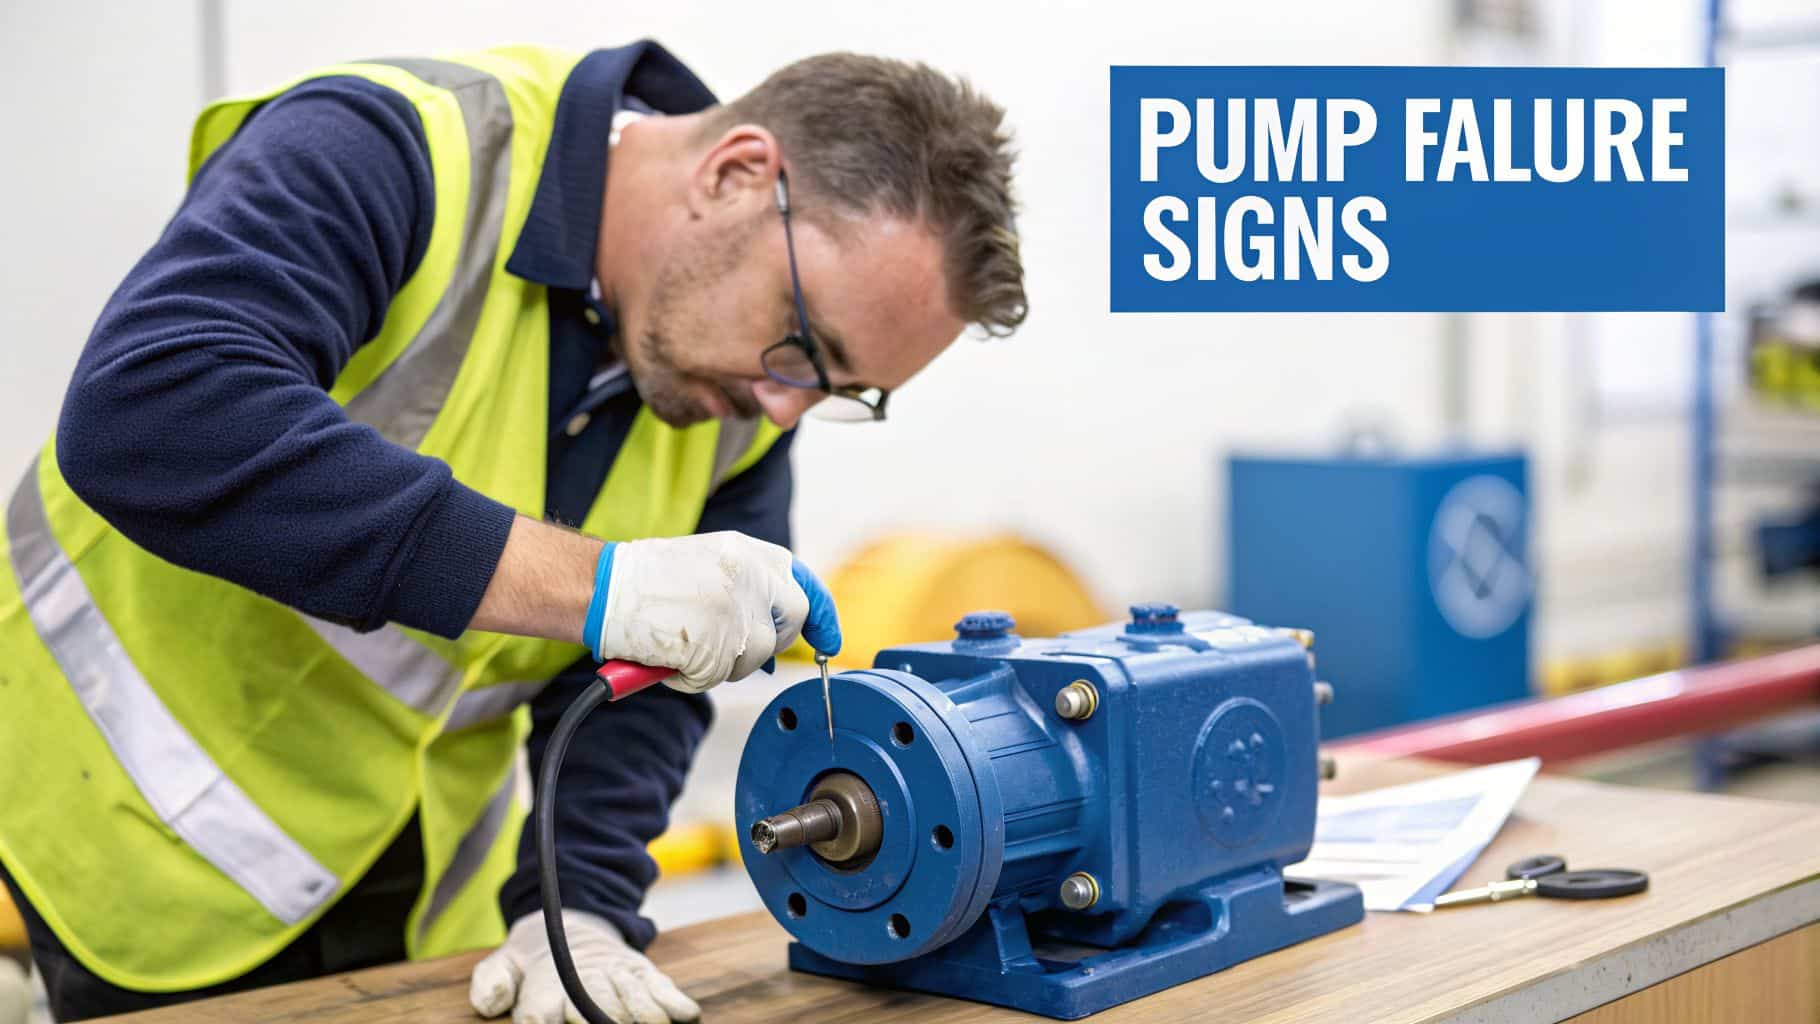
For anyone responsible for keeping machinery running, whether you're a plant fitter or an agricultural engineer, knowing how to read these signs is a core skill. When downtime can cost thousands an hour, you simply can't afford to wait for a complete breakdown. You need to learn to listen to what your equipment is telling you.
Listen, Look, and Feel: The Key Warning Signs
Your senses are your best diagnostic tools. Most failing pumps will give off clear signals long before they give up completely. Pay attention to what you can hear, see, and feel during a normal cycle.
-
Strange Noises: Your ears will often be the first to know. A high-pitched whine usually points to aeration or cavitation—air getting into the fluid. A grinding or knocking sound is far more serious. That's the sound of metal-on-metal contact, likely from failing bearings or contamination chewing up internal parts.
-
Running Hot: Place a hand near the pump (safely, of course). Is it significantly hotter than usual? An overheating pump is working too hard. This could be due to internal friction from wear and tear, the wrong type of hydraulic fluid, or a blockage somewhere in the system creating excessive back pressure.
-
Slow or Weak Operation: If your hydraulic rams are jerky, slow to respond, or just don't have the muscle they used to, the pump is probably the culprit. It's likely not generating the required flow or pressure anymore, a classic symptom of internal wear and bypassing.
-
Visible Fluid Leaks: This one is obvious but critical. A weeping seal or a drip from the pump housing isn't just a housekeeping issue; it's a clear sign of trouble. Many cases of hydraulic system leakage start small before becoming major blowouts. A leak around the main shaft seal is a particularly bad sign.
From Symptom to Diagnosis
To help you quickly connect the dots between what you're observing and what might be happening inside your pump, here’s a quick-reference table. It’s designed to give you a solid starting point for your investigation.
Common Hydraulic Pump Failure Symptoms and Potential Causes
| Symptom | Possible Cause | Initial Action to Consider |
|---|---|---|
| High-pitched whining | Aeration (air entering the system) or Cavitation (fluid vapourising). | Check fluid level, inspect suction lines for leaks, and check strainer/filter. |
| Grinding/knocking noise | Worn bearings, contaminated fluid, major internal component failure. | Shut down immediately. Check for metal particles in the filter and fluid. |
| Excessive heat | Internal leakage, incorrect fluid viscosity, system pressure set too high. | Verify system pressure, check fluid specifications, and inspect for restrictions. |
| Sluggish/jerky movement | Internal wear (bypassing), low fluid level, worn pump drive coupling. | Check system pressure under load. Inspect fluid for contamination. |
| Visible external leaks | Failed shaft seal, worn housing gaskets, cracked pump casing. | Identify the exact source of the leak. A failed shaft seal often points to a worn bearing. |
This table is a great starting point, but remember to always verify your suspicions. One of the most vital tools for this is a pressure gauge. Knowing your system's pressure is fundamental, and if you need a refresher, our guide on a hydraulic pressure gauge is a great resource.
In my experience, a pump almost never fails without giving you a heads-up. The vast majority of catastrophic breakdowns are preceded by subtle changes in noise, heat, or performance that were simply missed or ignored.
By getting familiar with these tell-tale signs, you can shift from a reactive, "fix-it-when-it-breaks" mindset to a proactive one. This approach doesn't just prevent costly failures; it dramatically extends the life of your hydraulic systems.
Now that you know what to look for, the next step is getting your hands dirty. Let’s look at the tools and safety measures you'll need before you even think about cracking open that pump casing.
Getting Set Up: Your Essential Toolkit and Safety Checks
Before you lay a spanner on a hydraulic pump, let's talk about getting set up properly. I've seen far too many jobs go wrong—and become dangerous—because someone jumped in with the wrong tools or, worse, a casual attitude towards safety. A successful repair starts long before you undo the first bolt.
Think of it this way: a clean, organised workspace and the right kit aren't just about looking professional; they're the foundation for a safe and efficient job.
The Right Tools for the Job
You can't fake it with a basic socket set from the local motor factors. Professional hydraulic work demands a specific set of clean, quality tools.
H3: The Hand Tool Essentials
Here’s what I expect any good engineer to have in their toolbox for a pump repair:
- Spanners and Sockets: You'll need a full metric set. I always recommend having good-quality ring spanners; they give you a much better grip on tight housing bolts than an open-ended spanner. A comprehensive socket set with plenty of extensions and a few universal joints is a must-have for getting into awkward spots.
- A Calibrated Torque Wrench: This isn't up for debate. When you put the pump back together, every bolt needs tightening to the manufacturer's exact specification. Too tight, and you can warp the housing; too loose, and you're guaranteeing a leak or catastrophic failure down the line.
- Seal Picks and Hooks: Forget about using a screwdriver to get old O-rings out. That's the quickest way to scratch a precision-machined groove and create a new leak path. A proper set of delicate picks and hooks is the only way to do it without causing damage.
- Manual Impact Driver: For those stubborn, seized cap screws on end covers, nothing beats an old-school manual impact driver. A sharp whack with a hammer provides the shock needed to break them free without rounding the heads.
- Circlip Pliers: You'll need both internal and external types to handle the retaining rings on shafts and inside bores. Make sure you have a decent set that won't bend under pressure.
H3: The Specialised Gear
Beyond the hand tools, a few key pieces of equipment really separate a professional job from an amateur one.
A hydraulic press is your best friend for carefully removing and installing bearings or pressed-on gears. I’ve seen expensive castings cracked by someone trying to use a hammer and a drift. It’s just not worth the risk.
For diagnosing the problem in the first place, and for testing your work afterwards, a set of calibrated pressure gauges and a portable flow meter are indispensable. Without these, you’re flying blind and just guessing at the pump’s performance.
I can't stress this enough: the biggest and most dangerous mistake I see is people attempting a repair without fully depressurising the system first. That stored energy is no joke.
Your Safety Checklist: No Shortcuts
When it comes to hydraulics, safety is everything. These systems contain immense stored energy, even when the power is off. There are no shortcuts here.
First, always follow the proper Lockout/Tagout (LOTO) procedure for the machine. Isolate it completely from its power source and attach your personal lock and tag. This ensures no one can accidentally start it up while you’re working on it.
Next, and this is absolutely critical, you must safely release all stored pressure from the system. Trapped fluid can turn a fitting into a bullet or cause a high-pressure injection injury—which can be life-threatening. Check the machine's service manual for the correct procedure, which usually involves cycling the controls with the power off to bleed pressure back to the tank.
Finally, be prepared for oil. Have a proper spill kit with absorbent pads, granules, and containment booms on hand before you start. In the UK, you're legally responsible for preventing spills from contaminating the ground or drains. Always wear your PPE—as a minimum, this means safety glasses and oil-resistant gloves.
With the right preparation and a healthy respect for the power you're working with, you're ready to get started.
Need some expert advice or struggling to find the right parts for your repair? Give us a call on 01724 279508 or send us a message through our contact form.
A Hands-On Repair Guide for Common Pump Types
Right, let's get our hands dirty and dive into the pump itself. This is where you strip it down to find the fault and make the fix. From years of experience, I can tell you that a methodical approach here is what separates a quick fix from a recurring nightmare.
We’ll walk through the disassembly, inspection, and reassembly for the three main types of pumps you’ll find on everything from factory floors to farm machinery across the UK: gear, vane, and piston pumps. This isn't just a textbook procedure; it's a collection of practical insights for fitters and engineers who need to get the job done right.
But before you even think about touching a spanner, you need to get the prep work spot on. The following steps are non-negotiable.
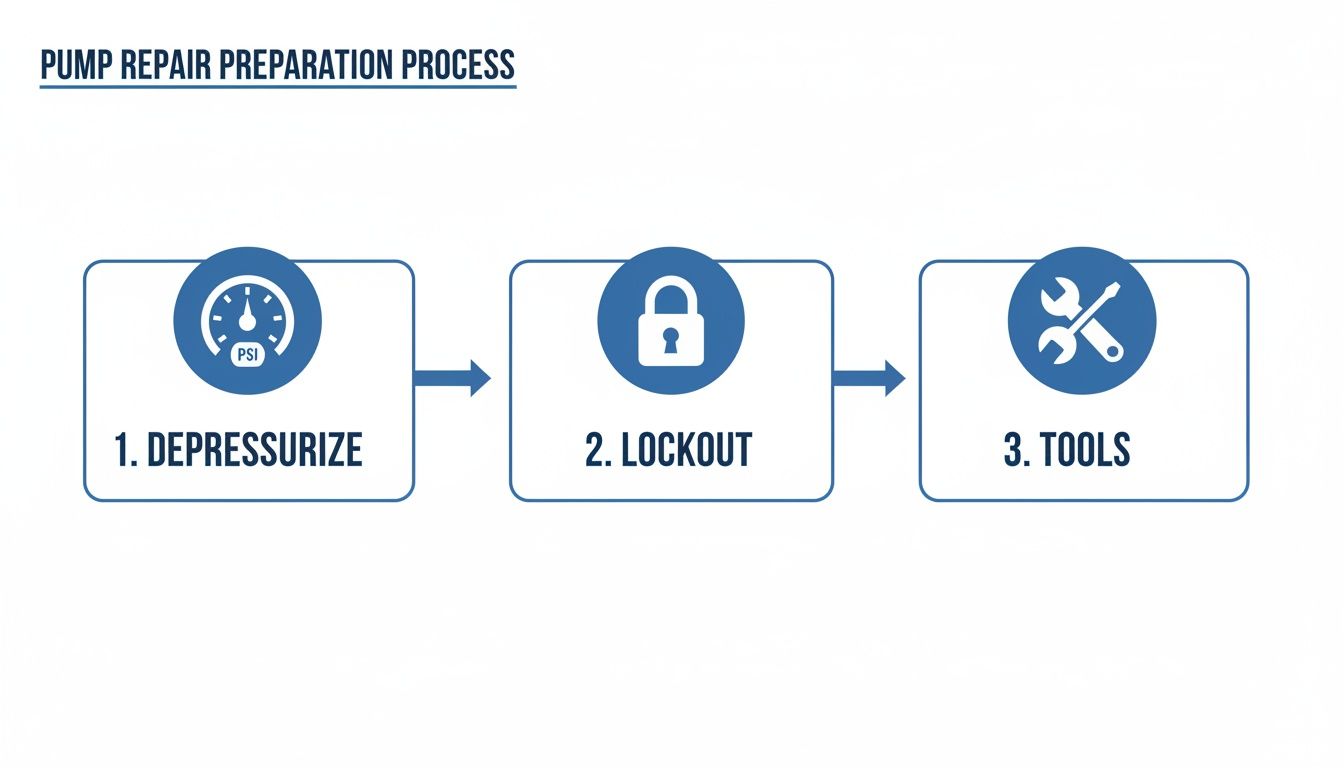
Depressurising the system, locking and tagging it out, and getting your tools organised—nail these three things, and you've laid the foundation for a safe and successful repair.
Tackling a Gear Pump Repair
Gear pumps are the absolute workhorses of the hydraulics world. They're loved for being simple and tough as old boots, which often makes a repair both straightforward and cost-effective.
Their importance to UK industry is undeniable. In 2026, production of gear and vane pumps skyrocketed to 2.6 million units, a massive 43% increase on the previous year. With gear pumps commanding the biggest slice of the market at 40.31% revenue share, keeping them running is critical. In a high-pressure environment, a failure can quickly lead to downtime costing thousands an hour. You can dig deeper into these figures in this UK market overview from IndexBox.
When you crack open a gear pump, your main focus will be on wear and tear on the gear teeth, the main housing, and the side plates (often called 'thrust' or 'wear' plates).
-
Disassembly Tip: Here’s a simple trick that saves a world of pain later. Before undoing any bolts, grab a scribe or paint marker and draw alignment marks across the different sections of the pump casing. It guarantees everything goes back together in the right orientation.
-
Inspection Points: Once it's apart, get the gears out and give them a thorough clean. Look closely for any scoring or pitting on the gear teeth. A good test is to run your fingernail across the inside of the housing where the gear tips spin. If you can feel a groove, even a tiny one, that’s a sign of serious wear and internal leakage. That bypassing is what kills efficiency.
-
Measuring Clearances: Now get your feeler gauges out. You need to measure the clearance between the gear tips and the housing, and also between the gear faces and the wear plates. Check these against the manufacturer’s specs. If the gap is too big, that’s a direct route for fluid to bypass the gears, forcing the pump to work harder for less flow.
-
Seal Replacement: This is a big one: always replace every single seal, O-ring, and gasket. It’s a false economy to reuse old ones. When you're fitting the new main shaft seal, find a socket that has the same outer diameter as the seal's metal case. Use it to gently and evenly press the new seal into place. Whatever you do, don't tap on the delicate rubber lip.
Working on a Vane Pump
Vane pumps are a bit more refined. They run quieter than gear pumps and you'll find them all over industrial machinery. The repair process is more delicate because the internal parts are more fragile.
A common mistake I see is mechanics dropping the cartridge assembly during removal. The vanes and rotor are often made of hardened but brittle material. A short drop onto a concrete floor can easily chip a vane or damage the cam ring, turning a simple reseal job into a major parts replacement.
The core of a vane pump is its cartridge, which houses the rotor, vanes, and cam ring. In most cases, a repair simply involves swapping out this entire cartridge.
Key Inspection Steps for Vane Pumps
- Vane Movement: With the cartridge out, check that every vane slides smoothly in and out of its slot on the rotor. If they're sticking, it's usually down to varnish from old oil or contamination. This is a primary cause of failure.
- Cam Ring Surface: Have a close look at the inner surface of the cam ring. If you see a 'washboard' or rippled pattern, it's a dead giveaway of cavitation or severe contamination. The cartridge is toast and needs replacing.
- Pressure Plates: Examine the two pressure plates that sit on either side of the rotor. You’re on the lookout for scoring or any heat discolouration. These marks point to problems with lubrication or pressure balancing.
Repairing a Piston Pump
Piston pumps are the top-tier units. They're the most complex, the most expensive, and are reserved for high-pressure, high-performance systems like those on large excavators. A repair demands precision, absolute cleanliness, and a solid understanding of how they operate. Honestly, for many workshops, this is the point where you call in a specialist.
If you are tackling it yourself, you need to laser-focus on these critical areas:
- The Rotating Group: This is the heart of the pump, containing the cylinder block, pistons, slippers, and swashplate. Disassemble it on a perfectly clean bench, preferably with a rubber mat. It is crucial to keep each piston and its slipper together as a matched pair.
- Slipper and Swashplate Wear: Carefully inspect the bronze face of each piston slipper—the part that slides against the swashplate. Look for any scoring, discolouration, or evidence that the slipper has lifted and scuffed the plate. Any damage here spells trouble, reducing performance and meaning the pump is literally grinding itself up and creating its own contamination.
- Valve Plate Inspection: The valve plate is another precision component, directing fluid into and out of the cylinder block. Check its polished face for any scoring or erosion. A classic workshop technique is to cover the surface with engineer's blue and lightly lap it on a flat plate. This will instantly show up any low spots or wear patterns.
- Reassembly Care: When putting the rotating group back together, be generous with clean hydraulic fluid to lubricate every single component. Take extreme care when re-engaging the cylinder block with the valve plate—their precisely lapped surfaces can be damaged in an instant.
By following these practical steps and paying close attention to the details, you can significantly increase the chances of a successful and lasting hydraulic pump repair.
Struggling to identify a fault or need advice on sourcing the right parts? Phone 01724 279508 today, or send us a message and our technical team will be happy to help.
Sourcing Quality Parts and Performing Post-Repair Testing
A pump repair isn't truly finished just because you’ve tightened the last bolt. I’ve seen it countless times – a job looks complete, but its long-term reliability all comes down to what happens next. It boils down to two things: the quality of the parts you used and how thoroughly you test your work. Cutting corners on either is just asking for a repeat failure, often sooner rather than later.
The UK's industrial and mobile machinery depends on this stuff. The UK hydraulic pumps market is valued at around £190 million in 2026, and it’s growing. Gear pumps alone account for over 40% of that. What's more, industry data shows that up to 70% of pump failures are due to basic issues like contamination or worn seals within the first five years. This makes using quality parts and having reliable suppliers absolutely critical to keeping everything running.
Choosing the Right Components for a Lasting Repair
The bits and pieces you install are the very foundation of a solid repair. Sure, you might save a few quid upfront with cheap, unbranded components, but that’s a false economy. Poor performance, leaks, and another breakdown are often just around the corner, costing you far more in downtime and rework.
For instance, when sourcing seals, investing in high-grade Viton O-ring repair kits can make a world of difference. They offer far better resistance to high temperatures and aggressive fluids than the standard nitrile seals you find in cheaper kits.
Always try to get components that meet or, even better, exceed the original manufacturer's (OEM) specifications. At MA Hydraulics, we stick to brands with a proven track record for quality because we know they won’t let us or our customers down.
- Vivoil: A solid choice for their precision-made gear pumps, motors, and flow dividers.
- Hydronit: Our go-to for incredibly versatile and reliable compact power packs.
- OMT: For top-quality filters, bellhousings, and couplings that protect the whole system.
If you’re ever stuck on what parts to order, our team can point you in the right direction. We stock a huge range of hydraulic equipment supply from all the leading names.
A repair is only as good as its weakest part. I’ve seen countless pumps fail a second time simply because someone used a cheap, out-of-spec seal kit that couldn't handle the system's operating pressure or temperature.
Repair vs Replace Cost Analysis for a Group 2 Gear Pump
Deciding whether to repair an existing pump or buy a new one often comes down to cost. Here’s a quick, illustrative breakdown for a common Group 2 gear pump to help you weigh the options.
| Cost Item | In-House Repair Cost (£) | New Pump Cost (£) |
|---|---|---|
| Replacement Seal Kit | £30 | – |
| New Bearings/Bushings | £40 | – |
| Technician Labour (2 hours @ £50/hr) | £100 | – |
| Consumables (oil, cleaning fluid) | £15 | – |
| Cost of New Pump Unit | – | £250 |
| Total Cost | £185 | £250 |
As you can see, a straightforward repair can offer significant savings. However, this doesn't account for hidden damage or the cost of potential downtime if the repair fails. For more complex pumps or critical applications, a brand-new unit with a full warranty often provides better value and peace of mind.
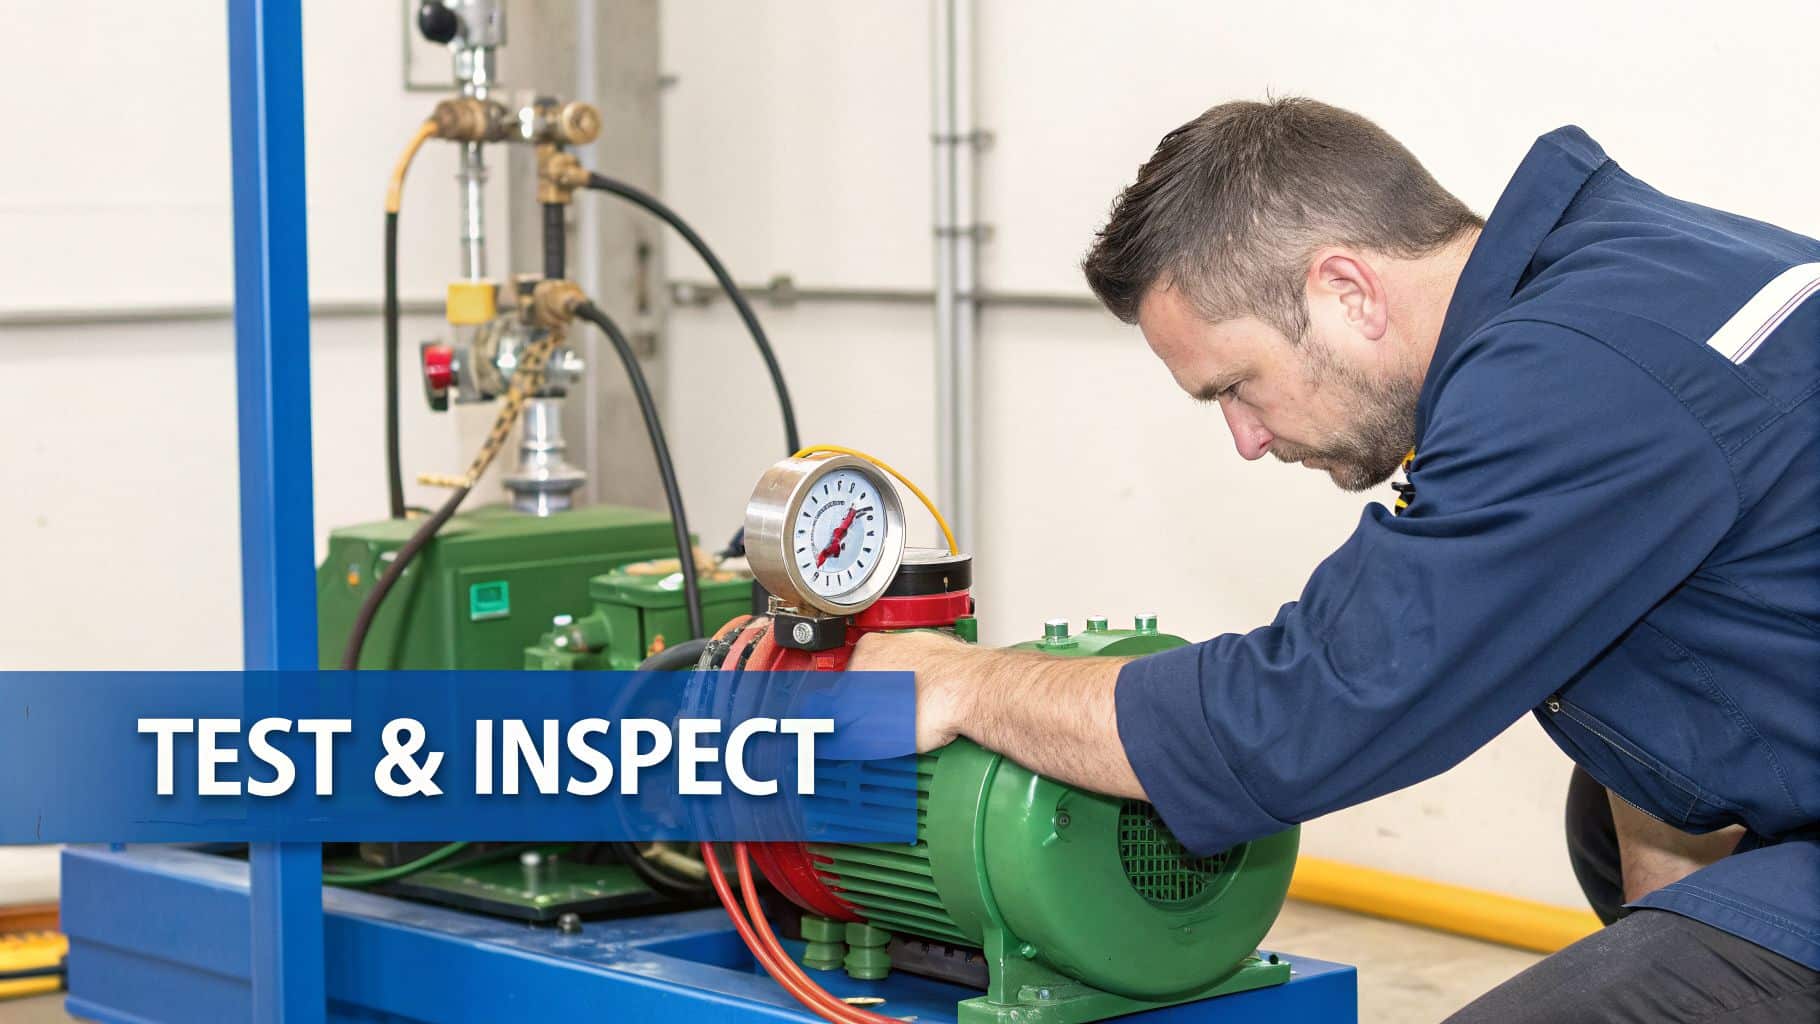
The Critical Post-Repair Testing Procedure
Right, the pump is back together. But you’re not done yet. Before it goes back into service, you have to verify its performance under controlled conditions. This is your final quality check – the one that confirms the repair worked and the machine is safe to run.
First, reinstall the pump but leave the main pressure line disconnected, routing it safely back to the tank. Just briefly jog the motor to confirm the direction of rotation is correct. Running a pump backwards, even for a split second, can instantly destroy it.
With rotation confirmed, connect all your lines and fire up the system at the lowest possible pressure. Let it run for a few minutes to circulate the oil and work out any trapped air. During this initial run-in, your own senses are your most valuable tools:
- Listen: The pump should have a smooth, consistent hum. If you hear any of the whining, grinding, or knocking that signalled the original failure, shut it down immediately and find out why.
- Look: Go over every single joint, seal, and connection. Look for any sign of weeping fluid. A pro tip: use a piece of cardboard to check for high-pressure pinhole leaks – never use your hand.
- Feel: Carefully hold your hand near the pump casing (don’t touch it directly). It will get warm, but it shouldn't get blazing hot in a matter of minutes. A rapid temperature spike points to excessive internal friction or bypassing.
Finally, hook up a flow meter and pressure gauge to the outlet. Slowly bring the system pressure up while watching the flow rate. Does it match the manufacturer's spec sheet? If the pump delivers the right flow at its rated pressure without overheating, leaking, or making a racket, you can call it a job well done.
Phone 01724 279508 today, or send us a message if you need a hand with your repair or want to source the best components for the job.
When You Need to Call in the Experts
There's a fine line between a challenging repair and a problem that's spiralling out of your workshop's capabilities. A good engineer knows where that line is. While tackling routine fixes in-house is smart and efficient, recognising when to call for specialist hydraulic pump repair isn't admitting defeat. It's a strategic move to stop a complex issue from becoming an operational disaster.
Pushing on with a repair that’s too big or intricate can easily lead to more damage, wasted hours, and even an unsafe machine. Sometimes, you just have to know when to pick up the phone.
The Clear Red Flags
From years of experience, we know there are certain situations that should immediately set alarm bells ringing. If you come across any of these, it's time to pause the job and get an expert on the line.
-
Catastrophic Casing Damage: A cracked, warped, or visibly damaged pump housing is a non-starter for a standard repair. We're talking about the very skeleton of the pump here. A simple parts swap isn't going to fix a compromised structure; it's a job that needs specialist assessment and potentially remanufacturing.
-
Complex Piston Pump Failures: Piston pumps are marvels of precision engineering. When you're dealing with issues in the swashplate, cylinder block, or valve plate, you're deep in specialist territory. Trying to diagnose and fix these intricate components without the right tools and know-how often creates more problems than it solves.
-
Recurring Breakdowns: Have you fixed the same pump for the same fault two or even three times? That's a classic sign you're only treating the symptom. The real culprit could be lurking elsewhere in the system—incorrect pressure settings, poor filtration, or even a design flaw in the hydraulic circuit. A specialist will hunt down that root cause.
-
Jobs Requiring Specialist Machining: Once you see scored internal bores, bent shafts, or surfaces that need re-lapping to microscopic tolerances, you've gone far beyond replacing a component. These tasks demand dedicated machining equipment and the skill to use it, which is the bread and butter of a specialist hydraulics firm.
The Value of Specialist Intervention
Bringing in a firm like MA Hydraulics means you're getting more than just a repair. You're accessing a depth of diagnostic experience and technology that offers a complete, long-term solution. With our state-of-the-art test rigs, we can precisely identify the root cause of any failure.
Across the UK, industries from construction to agriculture are pushing their hydraulic systems harder than ever. This is reflected in the 3.6% annual growth in the UK's hydraulic pumps sector. Getting repairs right can cut operational costs by 10-20%, while good proactive maintenance can extend a pump's life by a massive 50%. With downtime costing UK industries an estimated £180 billion every year, partnering with a specialist is a powerful way to protect your bottom line. You can explore more on the hydraulic pump market trends on Future Market Insights.
A specialist repair isn't just about getting a pump working again. It's about understanding why it failed and ensuring it doesn't happen again, often by improving the system it's part of.
We don't just fix what’s broken. Our team provides comprehensive fluid power services, including the design and in-house manufacture of bespoke industrial power packs and the assembly of Hydronit mini power packs. This allows us to offer a truly holistic solution—whether that’s a perfectly executed repair or a completely new, optimised system built for durability.
Don't let a tough pump problem bring your operations to a halt. If you've hit a wall, it’s our turn to step in.
Phone 01724 279508 today to discuss your requirements, or send us a message.
A Few Common Questions We Hear in the Workshop
To wrap things up, let's go over a few of the questions our engineers get asked almost every day. These are the things that often make the difference between a quick fix and a costly headache.
What's the Number One Killer of Hydraulic Pumps?
Nine times out of ten, when a pump comes into our workshop completely shot, the culprit is contamination. It’s responsible for a staggering 70% of all hydraulic system failures.
Think of it like this: tiny flecks of dirt, metal shavings, or even water get into the oil and act like liquid sandpaper. They just grind away at the precision-machined surfaces inside your pump until it gives up. Keeping your hydraulic fluid clean is genuinely the best thing you can do to protect your investment.
Should I Repair My Pump or Just Replace It?
This is a classic "it depends" situation, but we can offer some solid guidance. If you're dealing with a common gear pump, a repair is very often the most economical choice. But for a more complex piston pump, or if the main casing has a catastrophic crack, the balance can tip quickly.
You also have to weigh the cost of downtime. A new unit might get you back up and running faster, which could be worth the extra expense.
Our rule of thumb is pretty simple: if the quote for a full repair comes in at more than two-thirds the price of a brand-new pump, buying new is almost always the smarter long-term move.
How Often Do I Really Need to Service My System?
Your service schedule will always depend on what the machine is doing and the environment it's in. A pump on a factory press running 24/7 needs a different level of care than one on a farm tipper trailer used seasonally.
As a baseline, though, here’s what we recommend:
- Daily/Weekly: A quick visual inspection. Look for leaks, check fluid levels, and listen for any unusual noises.
- Annually (or every 2,000 hours): Get a full hydraulic fluid analysis done. This tells you the real story of what’s happening inside your system and catches problems before they become failures.
If your equipment is operating in a particularly dusty, dirty, or high-cycle environment, you'll want to shorten those intervals considerably.
For advice tailored specifically to your setup, give the team at MA Hydraulics a call on 01724 279508, or you can send us a message through our contact form.
Phone 01724 279508 today, or send us a message.
